After installing FPC from the repositories, you can follow the instructions on this page to proceed with the installation of Lazarus-IDE.
If you haven't already installed FreePascal Compiler(FPC, hereafter), then follow this link:
Installation on Linux: Installing FPC from the repositories
Before proceeding, we need to make an important adjustment in our Linux environment, when running programs built in Lazarus in the Linux environment, the following dependency message may appear in the terminal:
Gtk-Message: 00:00:00.000: Failed to load module “pk-gtk-module”
The program runs normally, but the lack of this dependency may indicate that some visual aspect is not as it should be, to correct the problem, run:
sudo -i echo "/usr/lib64/gtk-3.0/modules" >> /etc/ld.so.conf.d/pk-gtk.conf echo "/usr/lib64/gtk-2.0/modules" >> / etc/ld.so.conf.d/gtk2.conf ldconfig exitAnd the dependency message in the terminal will be gone.
Outra mensagem de erro que pode ocorrer é essa:
Gtk-Message: 11:27:33.649: Failed to load module “canberra-gtk-module”
Isso não é um erro fatal, apenas um aviso visual de que o módulo de sons do GTK (canberra-gtk-module) não está instalado. Ele é usado, por exemplo, para sons de cliques ou alertas em interfaces gráficas, para remover este aviso, execute:
Num debian-like (debian, ubuntu, mint…):
sudo apt install -y qtbase5-dev # caso use KDE
sudo apt install -y libcanberra-gtk-module libcanberra-gtk3-module # caso use GNOME
Num sistema redhat-like (fedora):
sudo dnf install -y qt5pas-devel qt5-qtbase-devel # caso use KDE
sudo dnf install -y libcanberra-gtk2 libcanberra-gtk3 # caso use GNOME
Most of you reading these instructions will prefer to use the Lazarus installer or the fpcupdeluge. But there is a third way that works for Windows and Linux, installing directly from the Lazarus source code, sounds complicated, but it is not if you have downloaded or compiled programs via GIT before. There are some advantages to this, the self-compiled binary version will be specific to your hardware and therefore faster than the installer version. It will be similar to fpcupdeluge, but more economical and faster because we will use FreePascal(FPC from now on) pre-installed.
As Lazarus is in a GIT repository, we have another advantage >: version upgrade.
Follow the instructions below, although they are for Linux, the principles are the same for Windows. All references to ~ (tilda) you see in file edits you can exchange for /home/yourlogin, this will ensure that scripts and configuration files work.
1. Precisará dos fontes do Free Pascal Compiler(FPC)
Se você instalou o FPC (incluindo os fontes) a partir do repositório oficial, então precisamos anotar onde estão os fontes do FPC, execute o comando:
(se seu sistema for Redhat-like como o Fedora)
rpm -ql fpc-src
(se seu sistema for Debian-like como o Ubuntu)
dpkg -L fpc-source
(...)
/usr/share/fpcsrc/rtl/x86_64/set.inc
/usr/share/fpcsrc/rtl/x86_64/setjump.inc
/usr/share/fpcsrc/rtl/x86_64/setjumph.inc
/usr/share/fpcsrc/rtl/x86_64/strings.inc
/usr/share/fpcsrc/rtl/x86_64/stringss.inc
/usr/share/fpcsrc/rtl/x86_64/x86_64.inc (...)You will discover and notice that they have been installed in /usr/share/fpcsrc, make note of this path because we'll need it later.
2. Apague a configuração anterior em seu perfil
Apague a pasta ~/.lazarus if it exists:
rm -fR ~/.lazarus3. Clonando o código fonte do Lazarus
Ainda no terminal, indique onde deseja que o lazarus seja baixado, por exemplo, se desejar diretamente na raiz de sua $HOME então:
cd ~
git clone https://gitlab.com/freepascal.org/lazarus/lazarus.git
cd lazarus
4. Git
Há duas formas de selecionar dentro do repositório o que queremos, através de ‘branch’ ou ‘tag’. Vamos usar a opção ‘tag’ que é a que funciona melhor no lazarus.
Para listar as versões existentes, você primeiro deve abandonar a branch atual caso tenha escolhido alguma:
git switch -E depois usar um comando abaixo para listar todas as versões disponíveis:
git tag (ou git branch -r, se preferir usar branches)E então todos os “tags”, isto é, versões serão listadas, nossa intenção aqui é selecionar uma versão mais recente:
(...)
lazarus_3_6
lazarus_3_0_RC1
lazarus_3_0_RC2
(...)
E finalmente vamos escolhê-la:
git checkout lazarus_3_6Atenção: As vezes você pode encontrar o sufixo “fixes_”, por exemplo, ao listar os branches e encontrar “lazarus_3_6” e “fixes_3_6”, nessa situação dê preferência a última porque já contêm as correções.
5. Vamos compilar
Finalmente após ter escolhido o branch ou tag adequado, poderemos compilar. Ainda no terminal, execute:
make clean make bigide (takes a while, but will compile everything)6. Criando um script para executá-lo no terminal
Note where Lazarus was installed, namely, ~/lazarus and then create a bash script for it:
(certifique-se que a pasta abaixo exista)
mkdir -p ~/.local/bin
gnome-text-editor ~/.local/bin/runlazarus.sh
Paste this content:
#!/bin/sh
# Lazarus
cd ~/lazarus
./lazarus "$@"
Save the above script and then run it in terminal:
chmod a+x ~/.local/bin/runlazarus.shEm qualquer lugar que tivermos do terminal, se digitarmos runlazarus.sh então estaremos executando o lazarus pelo terminal, mas isso pode falhar porque em algumas distribuições Linux o caminho ~/.local/bin não está no ‘search path‘ do sistema, se este for o seu caso, edite o arquivo ~/.basrh e acrescente no final deste arquivo:
chmod a+x ~/.local/bin/runlazarus.sh7. Criando um atalho para o ambiente gráfico
Crie um atalho para ele em sua área de trabalho:
gnome-text-editor ~/.local/share/applications/lazarus.desktopand then paste the instructions below:
[Desktop Entry]
Version=1.0
Type=Application
Name=Lazarus IDE with Free Pascal Compiler
Exec=/home/$USER/lazarus/lazarus %f
Path=/home/$USER/lazarus
Icon=/home/$USER/lazarus/images/icons/lazarus.ico
GenericName=Lazarus IDE with Free Pascal Compiler
Categories=Application;IDE;Development;GUIDesigner;Programming;
Keywords=editor;Pascal;IDE;FreePascal;fpc;Design;Designer;
ALERT: Substitua “$USER” pelo seu login ou local onde seu Lazarus esta instalado.
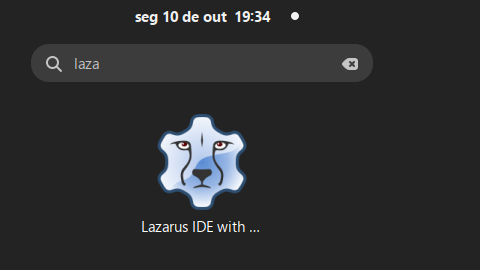
Salve o arquivo, a partir de agora, o Lazarus aparecerá no menu de seu sistema se procurar pelo nome como mostra a figura abaixo. Contudo, se o ícone não aparecer, talvez você tenha esquecido de trocar o $USER conforme o alerta ou simplesmente precise reiniciar seu login:

I recommend that you use your system menu to run Lazarus, but if you want to do it from the command line, use the script created:
runlazarus.shOpcionalmente, usando a opção –pcp=~/lazarus/configs você direciona a configuração do Lazarus para uma pasta específica, isso é ótimo para que cada versão diferente do Lazarus tenha sua própria pasta de configuração e não contamine as configurações uns dos outros.
8. Atualizando os fontes do Lazarus
Eventually you might want to download new versions or updates, it's a git repository so there won't be any problems, whenever you need to use the commands:
git pull E então completar o processo com a própria IDE, basta ir em Ferramentas|Configurar construção do Lazarus e então concluir em Ferramentas|Construir o lazarus com o perfil…
10. Se algo não tá dando certo…
If something turns out different than expected, access the link below, it was the original link where the instructions were based, maybe it will clarify what went wrong:
https://wiki.lazarus.freepascal.org/Getting_Lazarus
11. Alguém disse “cross-compiling”?
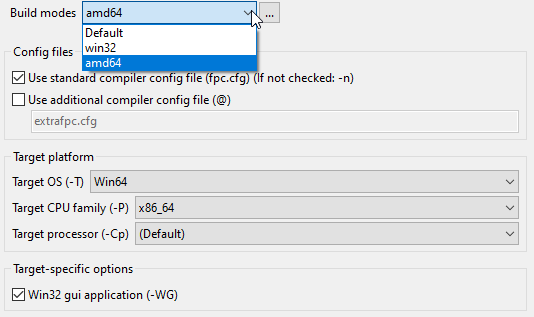
Caso tenha optado pelo cross-compiling, baixando e instalando as duas versões, ao compilar um project você vai na IDE, em Project|Project Options|Compiler Options|Config and Targets e cria os Builds Modes, um para win32 e outro para win64, o qual prefiro chamar de amd64:

No caso de ter optado por crosscompiling, terá de aprender a criar Build Modes para win32 e outra para win64(amd64) depois de criar então ajustar em Project|Project Options|Compiler Options|Config and Targets os parametros Target OS e Target CPU Family que são os mais importantes para indicar o sistema operacional e a arquitetura.
Integrando o editor de código com ajuda on line(Help)
Quando usado o instalador oficial do Lazarus o editor de código é integrado a ajuda online, ou seja, se você der um F1 quando uma função ou método estiver em foco então uma janela abre-se com uma explicação sobre o mesmo. Infelizmente isso não funciona quando você faz a instalação manual do Lazarus. É muito recomendado que você faça essa instalação, por isso siga o link abaixo que descreverá como fazê-lo.
Integrando o editor de código com ajuda on line(Help)
Tá difícil, assista ao vídeo
If you felt difficulty in the article, watch the video below: